I’m going to show how I achieved the camera shutter button and animation using Swift, more or less the same with the stock iOS camera app. Grab a coffee because this one’s going to be a little longer.
Storyboard UI
On your ViewController, drag a UIButton and place it at the bottom part. On the Size Inspector, give it a width and height of 65, thus creating a perfect square. Add the width and height constraint, also the bottom anchor.
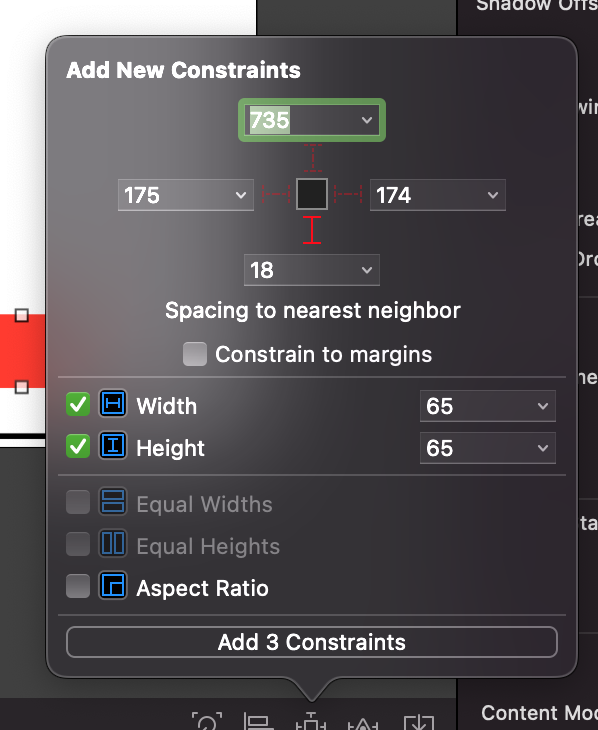
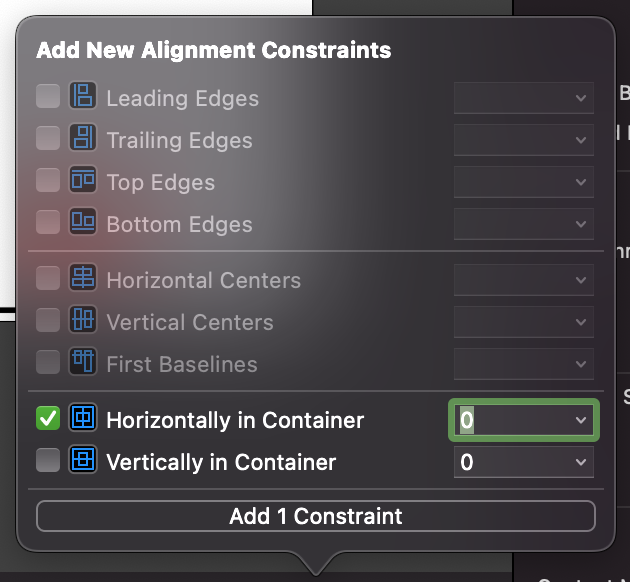
And, also the horizontal alignment constraint to 0.
Before we proceed, there is a flaw in our UI implementation. As you noticed we shouldn’t use the bottom constraint because once we implement the scale or translate animation it will hold off and pull down the UIButton back to its proper place regardless of its size. What we would like to do is for UIButton to maintain its screen position regardless of its size.
So let’s add a container UIView that will house our UIButton. Drag another UIView and this time make sure it fills up the majority of the bottom area. In the Size Inspector the values should be: x=4, y=741, width=406, height=100. After, add the necessary constraints as you see fit. Place the UIButton inside this newly added container UIView. It should look like the one below.
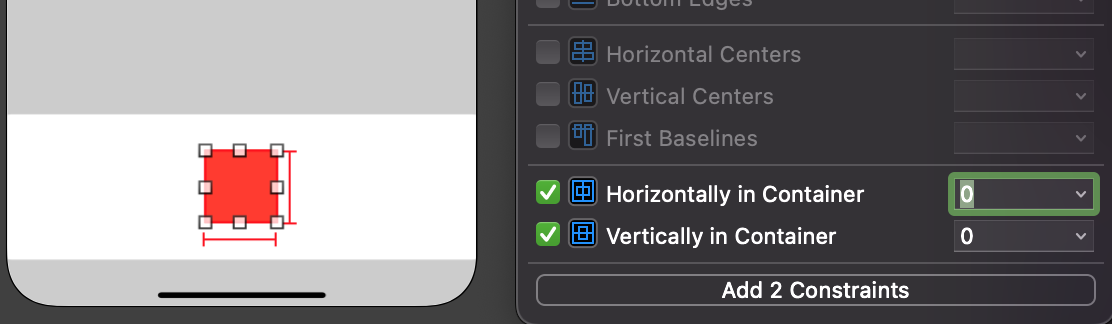
Update the UIButton constraints with both vertically and horizontally constraints. And now we don’t have to worry our UIButton not scaling properly when resizing.
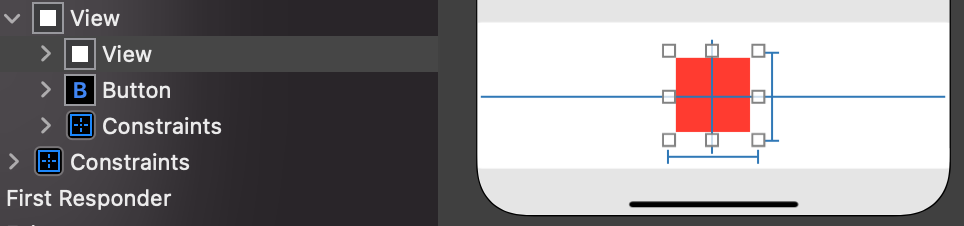
Now, for the border that will surround our UIButton. Drag a UIView inside the container UIView and behind the UIButton and make sure it is much more larger in terms of width and height. Set both width and height to 80. For our border UIView, add the following width and height constraints and also the horizontally and vertically constraint, same with our UIButton. It should look like the one below.
Coding Time
Now let’s code. Let’s wire the outlets to our ViewController. Also, include the width and height constraint of our UIButton.
class CustomCameraViewController: UIViewController {
    @IBOutlet weak var captureButton: UIButton!
    @IBOutlet weak var captureButtonWidthConstraint: NSLayoutConstraint!
    @IBOutlet weak var captureButtonHeightConstraint: NSLayoutConstraint!
    @IBOutlet weak var captureBorderView: UIView!
    private let videoCaptureOutput = AVCaptureMovieFileOutput()
}
In our viewDidLoad, let’s turn our squares (both capture UIButton and border UIView) into circles to signify a ready to record status.
override func viewDidLoad() {
        super.viewDidLoad()
        captureButton.layer.cornerRadius = captureButton.frame.size.width / 2
        captureButton.clipsToBounds = true
        captureBorderView.layer.borderWidth = 6.0
        captureBorderView.layer.borderColor = UIColor.red.cgColor
        captureBorderView.layer.cornerRadius = captureBorderView.frame.size.width / 2
}
Next, wire the IBAction from our capture UIButton. And below is all the code and as you can see I added a pulse animation just to make it more clearer the recording status.
@IBAction func captureTapped(_ sender: Any) {
    toggleVideoRecording()
}
private func toggleVideoRecording1() {
        if !videoCaptureOutput.isRecording {
            DispatchQueue.main.async {
                UIView.animate(withDuration: 0.2, animations: {
                    self.captureButtonWidthConstraint.constant = 35
                    self.captureButtonHeightConstraint.constant = 35
                    self.captureButton.layer.cornerRadius = 9
                    UIView.animate(withDuration: 0.4, animations: {
                        let pulseAnimation = CABasicAnimation(keyPath: "opacity")
                        pulseAnimation.duration = 0.5
                        pulseAnimation.fromValue = 0
                        pulseAnimation.toValue = 1
                        pulseAnimation.timingFunction = CAMediaTimingFunction(name: .easeInEaseOut)
                        pulseAnimation.autoreverses = true
                        pulseAnimation.repeatCount = .infinity
                        self.captureBorderView.layer.add(pulseAnimation, forKey: "Pulse")
                    })
                    self.captureButton.layoutIfNeeded()
                })
            }
        } else {
            // Stop recording
            videoCaptureOutput.stopRecording()
            DispatchQueue.main.async {
                UIView.animate(withDuration: 0.2, animations: {
                    self.captureButtonWidthConstraint.constant = 65
                    self.captureButtonHeightConstraint.constant = 65
                    self.captureButton.layer.cornerRadius = 32.5
                    UIView.animate(withDuration: 0.4, animations: {
                        self.captureBorderView.layoutIfNeeded()
                        self.captureBorderView.layer.removeAnimation(forKey: "Pulse")
                    })
                    self.captureButton.layoutIfNeeded()
                })
            }
        }
    }
Let me know if you have any questions and clarifications. You can email me at [email protected] directly.
